Creating a Java Project
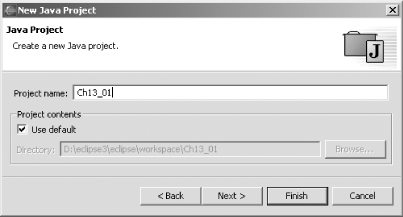
For Java programmers, the fundamental Eclipse task is creating a Java project. As you're going to see, the process is (so far) virtually identical to working in Eclipse 2.1. To create a new project, right-click the Navigator view and selectNew  Project, opening the New Project dialog. Select the Java item in the pane on the left and Java Project in the pane on the right and click Next. These dialogs you see in Screenshot-2 are just as we've seen before. Name this new project Ch13_01 and click Next.
Screenshot-2. Naming the new project
This brings up the familiar dialog you see in Screenshot-3, where you can set project settings, such as the source folder and the import and export order—all items we're already familiar with. Click Finish to create the project.
Screenshot-3. Setting project options

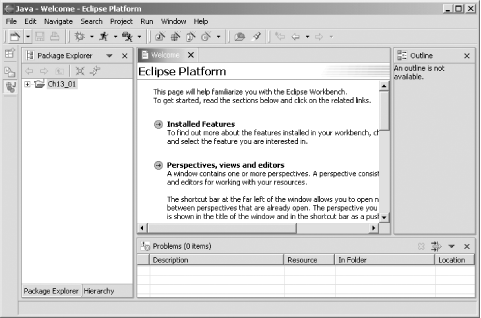
Eclipse 3.0 will ask if you want to switch to the Java perspective; click OK. The new Java perspective looks much like what we've seen before, except that the Tasks view has now been renamed the Problems view, as you see in Screenshot-4.
Screenshot-4. The Eclipse 3.0 Java perspective
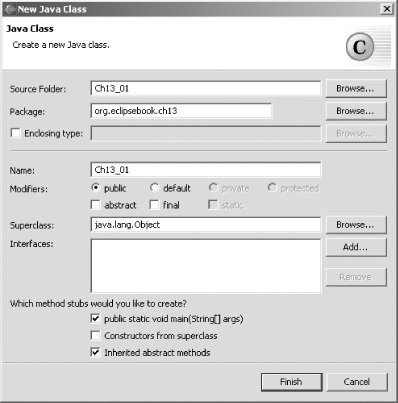
To create a new class, right-click the project and select New Class, opening the New Java Class dialog you see in Screenshot-5. This is the same dialog we've worked with throughout this tutorial, so just enter the new class's name, Ch13_01, and package, org.eclipsebook.ch13, and click Finish.
Screenshot-5. Creating a new class
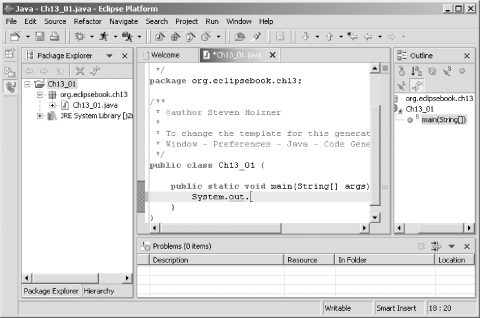
Opening the new Java file in the Java editor reveals some changes—for example, the new shape of the cursor, as you see in Screenshot-6. That's the smart insert cursor, which is covered a little later in this chapter—see . Note also the two new buttons in the Outline view—Hide Local Types and Link With Editor.
Screenshot-6. Using the Java editor
At left in the new JDT editor is the Quick Diff bar, which lets you track differences to particular lines as compared to what's been saved on disk (or, if you configure it, to what's in a CVS repository). To see how Quick Diff works, enter System.out.println("Hello"); in the main method, and save the file (only the Save diskette icon appears in the toolbar now, not the Save All diskette icon). Next, change the line to System.out.println("Hello from Eclipse 3.0"); and let the mouse hover over the Quick Diff bar as you see in Screenshot-7. The original version of the code will appear, and you can restore it by clicking it.
|

Screenshot-7. Using Quick Diff

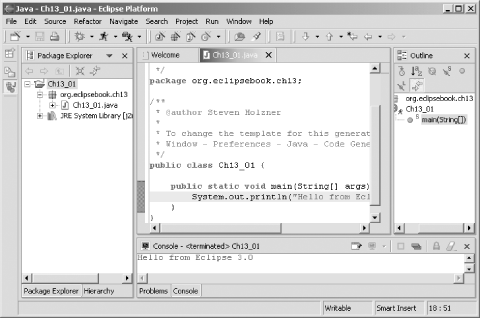
To run this code, select Run Run As Java app (note the new Run Run As JUnit Plug-in Test menu item as well), giving the results you see in the Console view in Screenshot-8. That's it; you've created and run a Java app in Eclipse 3.0. As you can see, the procss is very similar to what you would see in Eclipse 2.1.
|
Screenshot-8. Running the code
That recreates a familiar task for us in Eclipse 3.0, and, as you can see, it works much as we've seen before. Perhaps the biggest change in Version 3.0 is that the Eclipse platform has been broadened for use as a general hosting tool, designed to work with general apps, not just IDEs. Now general apps will be able to populate the menu bar and toolbars, and the assumed data model will no longer be necessarily centered on the workspace. We'll be seeing more on that as Eclipse 3.0 nears launch. There are also specific changes to the various parts of Eclipse—the Eclipse platform itself, the JDT, SWT, and so on—and we'll examine them on a case-by-case basis.